Image Map
Showing posts with label Baby Quilts. Show all posts

Summersville Baby Quilt

June 25, 2012

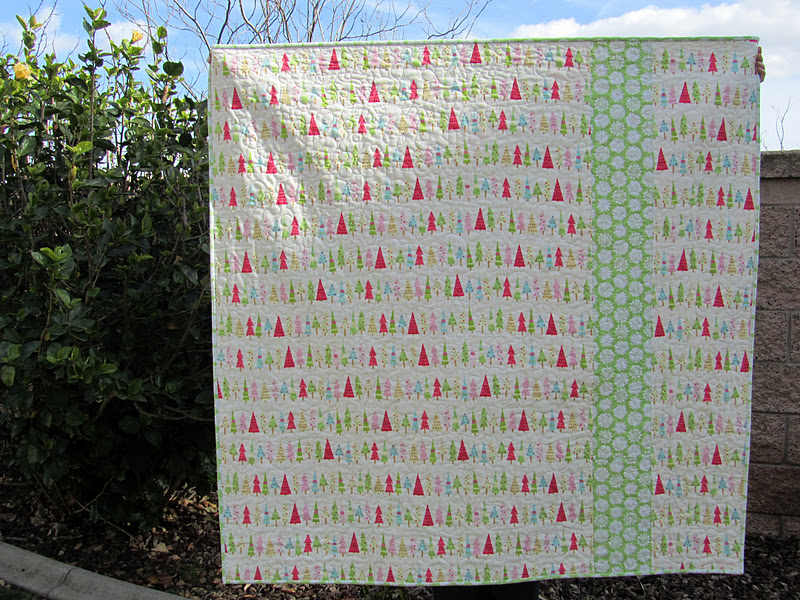
I absolutely fell in love with Lucie Summers' Summersville fabric collection when I first laid eyes on it at Quilt Market last Fall.  With that, I had been looking for the perfect project to use Summersville, when a family friend commissioned me to make a gender neutral baby quilt.  While at Quilt Market this Spring, I picked up Cluck Cluck Sew's new Inside Out quilt pattern.  Ordered some Summersville, and before I knew it I had found the perfect project to use Summersville!  :)


Although the cutting took a good amount of time, the quilt top came together quite quickly.  I used Kona Cotton Snow for the pluses, and absolutely love how the quilt came out.
 

I used a new long arm quilt pattern, and am very happy with how everything turned out.  The parents are NYC dwellers, so I wanted to achieve a modern/urban feel with the quilt.


Since it is a baby quilt, I opted to use fun and quirky alphabet print on the back.  I also couldn't resist adding a strip of the line work/binding fabric to the backing.


This sweet baby is not only getting a quilt, but also a stuffed owl!  Our family friend was interested in learning how to sew.  Like so many, she had a bad experience with her Home Ec teacher in junior high and I had high hopes of re-introducing her to the sewing machine and hopefully overriding her past experience.  I taught my first adult sewing lesson, and we spent four hours after church working on this cutie (pattern is Olive the Owl by Freddie's Friends).  I have to say that I was so impressed with her sweet little owl, and know that the baby will love it!  :)

Outfoxed + Be Merry

January 30, 2012

It's not quite the end of January and I have already finished two quilts!  (Its hard to believe as I'm usually such a procrastinator and its not abnormal for quilts to sit months/years before getting around to bind them.)


The first quilt is a fun baby quilt, made using Lizzy House's Outfoxed fabric collection, and my tutorial (although since the quilt was for a baby boy I simply omitted the circles and ric rac!).
 

I chose the main fox print for the back of the quilt, as this quilt was made for a very special little boy.  My friends just adopted a baby boy whose middle name is Fox, which is his mom's grandma's maiden name (following me?).  With that, I took one glimpse of the Outfoxed fabric and knew that I had to make him something special.  :)


Close up of the quilting, done by me!  :)


The second quilt is a fun lap quilt, made with Riley Blake's Be Merry Christmas fabric line (circa 2009), and The Quilted Fish's Sassy Squares No. 2 quilt pattern.


The backing is flannel, and the quilt was quilted with white snowflakes!

I have two more quilts in the works, and hope to be able to share completed versions with you in the near future!  I'm using this tutorial for one of the quilts, using Robert Kaufman's Pick a Bunch fabric collection, and this fun tool for the other quilt, using Riley Blake's So Sophie fabric collection.

Are you working on any quilts?  If so, I would love to hear about them!  :)

GO! Baby Tutorial: Scattered Flowers Baby Quilt

August 2, 2011

I'm so excited to debut my FIRST Quilt Tutorial- woo hoo!  The sweet folks at AccuQuilt sent me a GO! Baby Fabric Cutter, along with three GO! dies (I had such a hard time choosing, and am so happy with my decision to select the diamonds, circles, and strips).

I really can't say enough nice things about my experience with the GO! Baby, as I found the cuts to be precise, super fast, and safe!  I've never been a fan of the cutting phase of quilts, thus using the GO! Baby to reduce the time I spend at my cutting table is time I can spend doing other things that make me happy!  :)


Today's Scattered Flowers Baby Quilt Tutorial will feature AccuQuilt's Circle and 2.5" Strip die...I hope you love the quilt as much as I do!  :)

 
(Finished quilt measures approximately 36" x 36") 
 
Materials:
  • Coordinating Fabrics for Stripes (7 total): 1/3 yard each
  • Backing: 1 1/8 yard (I used the same fabric for the Backing and one of the Stripes.  If you choose to go the same route, you will need 1 1/2 yards for Backing/Stripe and 6 Coordinating Fabrics for the Stripes.)
  • Quilt Batting: 1 1/8 yard
  • Large Ric Rac (11/16"): 5/8 yard each (5 colors to coordinate with Strip Fabrics)
  • Heat n' Bond Lite (Sewable)
  • Fray Check

1.  From the seven Stripe Fabrics, cut an assortment of strips (varying in widths x +/- 37" in long).  Note, when cutting the strips, fold the fabric in half as shown below, and cut at +/- 18.5".  


The large piece will be used for the stripes and the binding, the remaining rectangle +/- 5.5" x 12" will be used for the circles.  I cut my strips as follows:
    
     #1= 2"           #6= 2.5"        #11= 3.75"      #16= 2.25"
     #2= 4.25"       #7= 2"           #12= 3"          #17" 1.75"
     #3= 1.5"         #8= 1.5"        #13= 2.5"       #18= 4"
     #4= 2.25"       #9= 4"           #14= 1.75"
     #5= 1.5"        #10= 2.5"      #15= 2"

2.  After cutting the stripes, use the remaining fabric and cut five 2.5" strips of fabric for the binding.  I used the GO! Baby 2.5" Strip Cutter die to cut my binding, and it was SO quick! 

3.  Roll five of the leftover stripe fabrics, designated for the circles (see photo from step #1), through the GO! Baby Fabric Cutter, using the Circle die (2", 3", and 5").


4.  Roll the Heat n' Bond Lite (sewable) through the GO! Baby Fabric Cutter, using the Circle die.  Per the Heat n' Bond directions, adhere the Heat n' Bond to the wrong side of the small and medium circles.  Set the large circles aside.

5.  Layout the stripes as desired, and with a 1/4" seam allowance sew the stripes, right sides together.  Press the seams towards the darker fabric.

6.  Sandwich the quilt batting between the wrong sides of the quilt top and backing.  Quilt as desired.  (I used a large zig zag stitch, every third row).


7.  Place the circles (small and medium) on the quilt, as desired.  Remove the Heat n' Bond backing from each circle, and iron in place.  Appliqué circles as desired.  (I used a zig zag stitch around each circle).


8.  For the large circles, pin the large ric rac around the circle.  Trim the ric rac and Fray Check both cut ends.  On the wrong side of the fabric, center and iron on the Heat n' Bond (carefully, making sure to not melt the ric rac!).  Remove pins and repeat with remaining large circles.


9.  With the large circles, repeat step #7.
 

10.  Square up the quit, as needed.

11.  For the binding, piece the 5 strips by placing the fabric right sides together, perpendicular to each other, and sew across the two strips at a 45 degree angle.  Trim excess fabric at 1/4" and press seam open.

12.  With wrong sides together, press the binding in half.  With a 3/8" seam allowance, sew the raw edge of the binding to the quilt top, leaving a +/- 6" tail from the start of the binding.  When approaching the corners, make sure to stop 1/4” from the corner, lift your needle and presser foot and fold the binding up onto itself.  Fold the binding down again, aligning the raw edges and resume stitching.

13.  When approaching the start of the binding, with right sides together, stitch the end of the binding to the tail of the binding (from Step #11).  Finish sewing the raw edge of the binding to the quilt top.

14.  Fold over the binding to the back of the quilt and hand or machine stitch the binding in place, making sure to neatly miter the corners.          

  
I'm loving the stitching details on the back of the quilt!


Like what you see?  Make sure to sign up for AccuQuilt's email list (<------------ button is over there, towards the top of the column!) and they'll send you 22 free patterns.  How cool is that!?!

P.S.- Before I sign off, I want to give a 'thank you' shout out to my Momma, as she is always helping behind the scenes.  She knows exactly when I need to be pushed, and I am forever grateful for her!  Thanks, Mom!!!  :)

Sneak Peek at Wednesday's Tutorial!

August 1, 2011

Oooh, I'm so excited to show you guys a sneak peek at my first quilt tutorial, which will be posted on Wednesday!  The quilt is made from Riley Blake's Alphabet Soup Girl (which is darling!).  Have I mentioned my love of gray and turquoise?  :)


I'll also be adding a handful of ric rac to the baby quilt.  I went shopping today solely for ric rac, and came home with the following.  I personally think everything is BETTER with a bit of ric rac?  Does anyone share the same belief?  :)


I'll be back on Wednesday, if not before then!  I hope everyone is having a wonderful Monday!  :)

Argyle With Style!

September 26, 2010

An argyle baby quilt...I don't even know where to start!

I love argyle as it is so clean, simple, and everlasting; and baby quilts, well they are small, colorful, and always aim to please/comfort a child. The two combined, if I say so myself, make one awesome newborn gift! My Momma whipped up this beauty for a family friend's granddaughter!


I love the contrast of the green against the pinks and the jumbo (1 13/32") yellow ric rac really finishes off the quilt!


The quilt back continues the green and pink color combination! If you are in love (like I am!) and are interested in making your own argyle baby quilt, the pattern (Argyle With Style by Bate and Taylor) is now conveniently available at JoAnn's. Great job Mom!!! :)

Baby Quilt #4...the last of its kind!

July 25, 2009

Did someone say a special little boy was having a 1st birthday? :) The last couple of weeks I've been diligently working on birthday presents for a dear friend's son, as he is one today!


I adapted
Jennifer Arey's, of Baby's Breath Quilts, Tumbling Squares Baby Quilt by adding an additional row, making the quilt +/- 36" x 40". I opted to have this project professionally quilted (got to love the loop-de-loop pattern!).


With my mom's help (she has the patience of a Saint!) I also made a special bib for the birthday boy, using Chickpea Sewing Studio's bib pattern! My applique needs a great deal of improvement, but then again I was satisfied with the outcome of my first attempt!


PS- With this post I also must announce that I'm retiring the above quilt pattern from my tutorial stash, and thus am in the market for a new pattern, so please pass any you may think might interest me my way!

Tah-Dah!!!

May 12, 2009

It is with great pleasure that I present the finished version of the 'Puppies Galore' quilt!


With this post I also must announce that I'm taking a crafting hiatus (with the exception of my Sew Blessed Quilters projects), as I've procrastinated long enough, and must take up studying for my architecture licensing exams as a hobby (ick!) until the end of June. I'll pop in to check on everyone for time to time, but until then I'm off to study!

Snips and Snails, and Puppy-Dogs' Tails

May 10, 2009

I hope everyone had a great Mother's Day! I spent the afternoon with my mom at M&L Fabrics (which was such a treat...such a wonderful selection of decently priced fabric!). While I was there I picked up the fabrics below, as I plan to make another quilt for a dear friend's little boy, using the same pattern as I did for the Puppies Galore and the Quilting 101 quilts, the Tumbling Squares Baby Quilt by Jennifer Arey of Baby's Breath Quilts.


A= Green (top left square)
B= Brown (top left rectangle)
C= Yellow Stripe (middle left rectangle)
D= Birds (top right square)
E= Snails (bottom rectangle)

Stay tuned for a finished picture of the Puppies Galore quilt, as I'm hoping to be able to find the time to attach the binding early this week. So close to the finish line...

Puppies Galore!

April 22, 2009

For everyone that is following my crafting expedition- I'm back to quilting (at least for now)! I'm making a baby boy quilt for a dear friend from high school, as he and his wife are expecting their first in early May! I'm using the same pattern as I did for Miss Catelin's and Miss Phoebe's quilts, the Tumbling Squares Baby Quilt by Jennifer Arey of Baby's Breath Quilts check out Jennifer's 'Block Cutting Chart', as the pattern is simple enough- five fabrics, one 6"x6" block pattern, and repeat 36 times!

A= White Polkadot (top left square)
B= Red print with bones and paws (top left rectangle)
C=Yellow stripe (middle left rectangle)
D= Green print with fire hydrants, etc. (top right square)
E= Puppy dogs (bottom rectangle)

To date I have all of the pieces cut, and partially sewn together. If I can get myself to focus on the task at hand, the quilt shouldn't take too long to complete. I'll post pictures when I'm done- wish me luck!

Quilting 101

March 26, 2009

I have to declare that 2009 has been ‘the year of my inner craft diva’.

It all started with a trip to Ginger's Quilt Shoppe, the day after Christmas, to pick out fabric for an apron that my Grandma B. is making (I’ll soon be the hippest chef in town)! While at Ginger’s we inquired about upcoming ‘Beginning Quilting’ classes, and I’ve been hooked from that moment on!

January proved to be a busy month from researching and purchasing my very own sewing machine, to buying fabric for quilts for my nieces, and additional fabric in preparation of my class at Ginger’s. February involved morphing into a student, as Tuesday evenings were spent at Ginger’s learning basic quilting techniques, as well as diligently working on the additional two quilts mentioned above. I’m proud to announce that I finished my first two quilts this week (just in time to hand deliver the quilts while Mr. D and I are in Atlanta)!

Ladybugs and vibrant colors for Miss Caetlin.

Hip baby patterns and muted colors for Miss Phoebe.

NOTE: The above quilts were created using a pattern by Jennifer Arey of Baby's Breath Quilts. Jennifer offers wonderful FREE Tumbling Squares Baby Quilt pattern, and great step-by-step quilting directions for any level sewer- check it out!